
Proper kitchen ventilation is crucial for maintaining air quality and comfort. Installing a kitchen ventilation duct not only expels odors and smoke but also helps in controlling moisture levels, thus preventing mold growth and ensuring a healthier living environment. How to install kitchen ventilation duct this brief guide will highlight the significant benefits of setting up a kitchen ventilation system and provide a step-by-step approach to ensure efficient installation. With the right tools and guidance, enhancing your kitchen’s functionality and safety through effective ventilation can be straightforward and impactful.
Assessing Your Needs and Planning
Before installing a kitchen ventilation duct, it’s essential to assess your specific needs and understand the available system types.cooking ventilation can range from simple exhaust fans to comprehensive range hoods. The key is determining the right size and type of ductwork that suits your kitchen’s layout and cooking habits. Measure the area where the ductwork will be installed and consider the volume of air that needs to be circulated. Choosing the correct size ensures efficient extraction of smoke, odors, and excess heat, enhancing overall kitchen functionality and comfort. Proper planning leads to optimal ventilation performance, making your cooking experience more pleasant and your home safer.
Tools and Materials Needed
To successfully install a cooking ventilation duct, you will need a variety of tools and materials. Essential tools include a measuring tape, drill, screwdriver, tin snips, and a level. Materials required are the ductwork itself, screws, duct tape, and possibly silicone sealant for airtight connections. For high-quality results, opt for galvanized steel or aluminum ducting due to their durability and resistance to corrosion. Additionally, vibration isolators may be used to minimize noise. These materials can be found at your local hardware store or through specialized online retailers. Using premium materials ensures a long-lasting installation that safely manages kitchen vapors and maintains indoor air quality.
Preparing the Installation Area
Preparing your kitchen for the installation of a ventilation duct is crucial for a smooth and safe process. Begin by clearing the area of any appliances, furniture, and other obstructions to provide easy access to the installation site. Ensure that the power is turned off at the circuit breaker to avoid any electrical hazards. Clean the area where the ductwork will be mounted to ensure a secure fit and seal. It’s also important to wear appropriate safety gear such as gloves and eye protection to prevent injuries. By carefully preparing the installation area and taking necessary safety precautions, you can help guarantee a seamless and secure setup of your new kitchen ventilation system.
Measuring and Cutting the Ductwork
Accurate measuring and precise cutting are essential steps in installing kitchen ventilation ductwork. First, measure the distance from your vent hood to the outside exhaust point to determine the length of ductwork needed. Use a tape measure for accuracy and add a few inches for adjustments. When cutting the ductwork, mark your measurements clearly on the metal with a permanent marker. Use tin snips for a clean cut; if you’re working with rigid ducts, a hacksaw may be necessary. Ensure each piece fits snugly without forcing it, as this can compromise the efficiency of your ventilation system. These careful preparations will ensure a perfect fit and optimal functionality of your cooking ventilation duct.
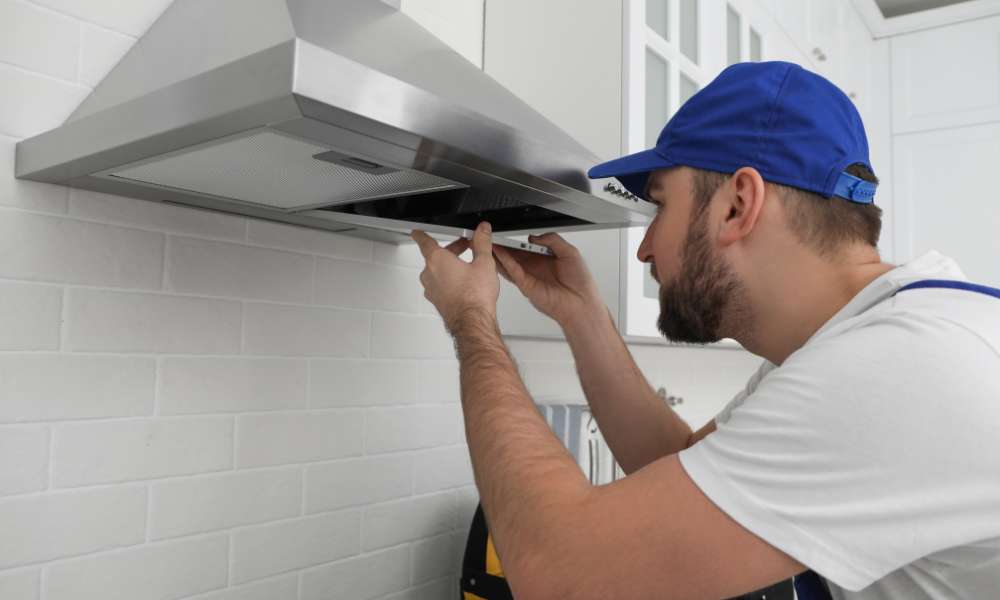
Installing the Vent Hood
Mounting the vent hood effectively is a critical step in the installation of your kitchen ventilation duct. Start by positioning the hood at the designated spot above your range, ensuring it’s centered and at the recommended height from the stove top—usually 24 to 30 inches for optimal performance. Use a level to ensure the hood is even before marking the drill points. Drill holes and secure the hood using screws and anchors suitable for your wall type (e.g., masonry, drywall). For a strong, lasting mount, consider using additional brackets if the model is particularly heavy. Once secured, connect the ductwork to the hood’s exhaust port, ensuring all joints are tight and sealed with duct tape or a clamping mechanism. Proper installation guarantees efficient extraction and a safer kitchen environment.
Connecting the Ductwork
Properly connecting the duct sections is essential for an efficient kitchen ventilation system. Start by aligning the ductwork sections end to end, ensuring that the seams fit snugly. Use HVAC foil tape to seal all joints between sections, as this will prevent air leaks and maintain the efficiency of your ventilation. For added durability, consider using metal screws to secure the connections before taping. Additionally, applying a layer of mastic sealant over the taped joints can provide an extra level of airtightness, enhancing overall system performance. By meticulously connecting and sealing each section of the ductwork, you ensure that your cooking ventilation is both effective and energy-efficient.
Mounting and Securing the Ductwork
Mounting the ductwork securely is vital to the stability and efficiency of your kitchen ventilation system. Begin by ensuring the path for your ductwork is clear of obstructions and aligned with the vent hood and exterior vent. Use sturdy supports, like brackets or clamps, to mount the ductwork along the route. These supports should be spaced appropriately, typically every 4 to 6 feet, to prevent sagging or dislocation over time.
To reduce vibrations and noise, incorporate vibration isolators or rubber padding at connection points between the ducts and the mounting hardware. This cushioning absorbs shocks and minimizes sound transmission, leading to a quieter and more stable ventilation system. Properly securing the ductwork not only enhances performance but also extends the life of your system.
Making Electrical Connections
Handling electrical components during the installation of a kitchen ventilation duct requires careful attention to safety and accuracy. Ensure that the power is turned off at the circuit breaker before starting. Use the wiring diagram provided with your vent hood to make the appropriate connections. Typically, this involves connecting color-coded wires together—usually black to black (hot), white to white (neutral), and green or bare to green or bare (ground).
After making the connections, secure them with wire nuts and electrical tape. Before restoring power, double-check every connection to ensure they are tight and properly insulated. Finally, test your installation by turning the power back on and operating the vent hood. Always perform these steps with caution to ensure a safe and effective setup of your kitchen’s electrical and ventilation systems.
Testing the Ventilation System
Once your kitchen ventilation duct is installed, proper testing is crucial to ensure it operates efficiently. Start by turning on the vent hood and checking for any unusual noises that could indicate loose parts or improper installation.To improve kitchen ventilation, consider installing an exhaust hood that effectively removes cooking odors and pollutants. Ensure that the airflow is strong and consistent at all vent exits. Use a smoke pencil or incense stick near the hood to confirm that the smoke is being effectively drawn into the ductwork.
If you encounter issues like weak airflow or excessive noise, recheck connections for tightness and verify that the ductwork is not kinked or overly bent. Also, ensure all seals are airtight to prevent leaks. Addressing these issues promptly can help optimize the performance and efficiency of your cooking ventilation system.
Maintenance Tips
Regular maintenance is key to ensuring your kitchen ventilation system remains efficient and effective. Clean the filters and check the ducts semi-annually for grease and debris buildup, which can impair airflow and efficiency. Inspect and tighten any loose connections and replace worn or damaged parts like filters and fan belts as needed.
It’s advisable to seek professional help for a thorough inspection and cleaning every one to two years, depending on your usage frequency and cooking style. Professionals can also tackle deeper issues like motor problems or significant ductwork repairs. Keeping up with these maintenance practices will prolong the life of your ventilation system and maintain optimal air quality in your kitchen.
Conclusion
To recap, installing a kitchen ventilation duct involves several key steps: assessing your needs, gathering the right tools and materials, preparing the installation area, measuring and cutting the ductwork, mounting the vent hood, connecting and securing the ductwork, making electrical connections, and testing the system. Following this guide ensures a safe and efficient setup that will significantly enhance your kitchen’s air quality.
We encourage you to undertake this installation to create a healthier, more comfortable cooking environment. Regular maintenance will keep your system running smoothly, contributing to a safer and more enjoyable kitchen experience. Embrace the benefits of a well-ventilated kitchen today!


