
Choose Track Lighting Kit
Selecting the right track lighting kit is the initial step in creating an effective and stylish light solution. Begin by considering your lighting needs and the room’s design. Determine the type of path (H, J, or L) How To Install Track Lighting, as well as the trail length and finish that complements your decor. Choose between line voltage or low-voltage systems based on your preferences and budget. Pay attention to the kit’s compatibility with trail heads and bulbs. Finally, select a kit that aligns with your design style, whether it’s contemporary, minimalist, or industrial. Picking the appropriate track light kit sets the foundation for a successful and visually appealing installation.
Select Ideal Location
Choosing the ideal location for your track lighting is pivotal for achieving the desired illumination and aesthetics. Assess the room’s layout, purpose, and light requirements. Identify areas that need focused lighting, such as kitchen counters, artwork, or workspaces. Consider ceiling height and clearance, ensuring the chosen location accommodates the trail and heads. Avoid obstructing views or creating glare. Ensure there’s access to an electrical junction box or an existing power source. By strategically placing your trail light, you enhance both functionality and the overall design, creating a well-lit and visually appealing atmosphere in your space.
Turn Off Electrical Power
Safety is paramount when installing path lighting, so start by turning off the electrical power. Locate the circuit breaker or light switch that controls the area where you’re working and switch it off. Use a voltage tester to double-check that there’s no electrical current running through the wires. This precautionary step ensures you’re working in a safe environment and minimizes the risk of electrical shocks or accidents while handling the wiring and trail components. Always prioritize safety when dealing with electrical installations.
Assemble Track Components
Assembling track components is a fundamental step in the trail light installation process. Begin by laying out the path sections and examining the manufacturer’s instructions. Connect the trail sections together using the provided connectors or couplers, ensuring a secure fit. Attach the end caps to conceal the open ends of the track. Pay attention to alignment and straightness during assembly to achieve a seamless look. Some trail systems may require an additional support bracket for longer runs or heavy fixtures, so follow the instructions carefully. Properly assembling the path components forms the backbone of your trail lighting system, ensuring stability and functionality.
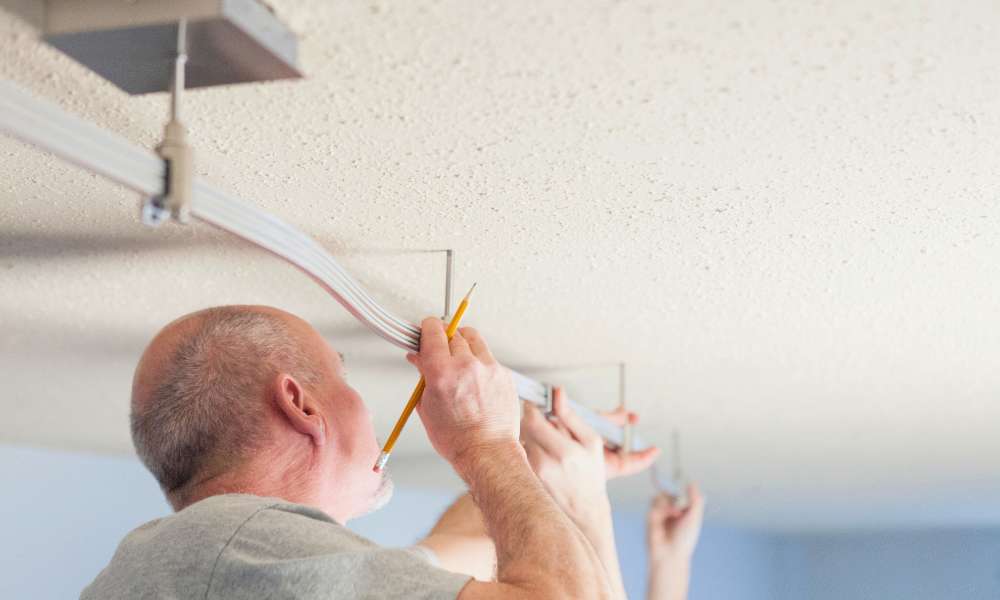
Attach Mounting Bracket
Attaching the mounting bracket is a critical step when installing track lighting. Begin by positioning the bracket over the junction box or electrical outlet in your chosen location. Ensure it’s level and aligned correctly. Secure the bracket in place by tightening the screws into the junction box or using the provided anchors and screws if necessary. Confirm that the bracket is sturdy and can support the weight of the trail and fixtures. The mounting bracket serves as the anchor for your path light system, providing stability and safety. By securely attaching it, you establish a reliable foundation for the entire installation, ensuring that your trail lighting operates flawlessly and safely.
Run Electrical Wiring
Running electrical wiring is a crucial step in the track lighting installation process. Start by connecting the wires from the electrical junction box to the track’s electrical feed. Follow the manufacturer’s instructions and adhere to local electrical codes to ensure safe and proper wiring connections. Securely fasten the wires with wire nuts and electrical tape, then carefully tuck them into the trail. Depending on the path type, you may need to attach a floating canopy or cover plate to conceal the wiring. Running electrical wiring correctly is essential for a functional and safe trail light system, ensuring that electricity flows smoothly to power your lights.
Secure the Track
Securing the track is a critical step in the trail lighting installation process. Use screws or anchors to attach the path to the mounting bracket securely. Ensure it’s level and aligned with your desired light direction. For longer tracks or those supporting heavy fixtures, consider additional support brackets as recommended by the manufacturer. Verify that the trail is stable and free from wobbling or movement. A securely mounted path forms the foundation for your trail lighting system, ensuring that it remains in place and provides a stable platform for your path heads. Proper trail installation enhances both safety and functionality.
Install Track Heads
Installing track heads is the exciting phase of your trail light installation. Simply align the track head with the path and insert it into the trail groove. Some systems may require a twist or snap-in installation. Ensure a secure connection, and tighten any locking screws or mechanisms provided to hold the track head in place. As you install each trail head, adjust its direction to achieve the desired light angle and coverage. Make sure to follow the manufacturer’s guidelines for bulb wattage and compatibility to prevent overheating. Installing path heads brings your lighting design to life, providing the focused illumination your space needs.
Adjust Track Heads
Adjusting track heads is the final touch in your trail lighting installation. Once installed, fine-tune the direction and angle of each path head to achieve the desired light effect. Illuminate specific areas or highlight artworks by pivoting the heads accordingly. Test the lighting at different angles to ensure it complements your room’s aesthetics and functionality. By carefully adjusting the trail heads, you personalize the light design, creating a well-lit and visually appealing environment that suits your needs and style.
Test and Finalize Installation
Testing and finalizing the track lighting installation is crucial for ensuring its functionality and safety. Turn the power back on and verify that all trail heads are working correctly. Check for any flickering or electrical issues and troubleshoot if necessary. Double-check that the path is secure, and all components are tightly fastened. Adjust the trail heads to fine-tune the light angle and direction, ensuring it meets your requirements. Assess the overall lighting effect from various angles and confirm it complements your room’s design. By conducting thorough testing and adjustments, you guarantee that your track light operates flawlessly, providing both style and function to your space.
Conclusion
Installing track lighting is a manageable DIY project that can enhance your space’s lighting and aesthetics. Begin by turning off the power, selecting the appropriate location, and securing the mounting bracket. Attach the track to the bracket, connect the wiring, and slide in the track heads. Finally, restore power and adjust the fixtures as needed. Track lighting offers versatility and can be a stylish addition to any room with proper installation.


