

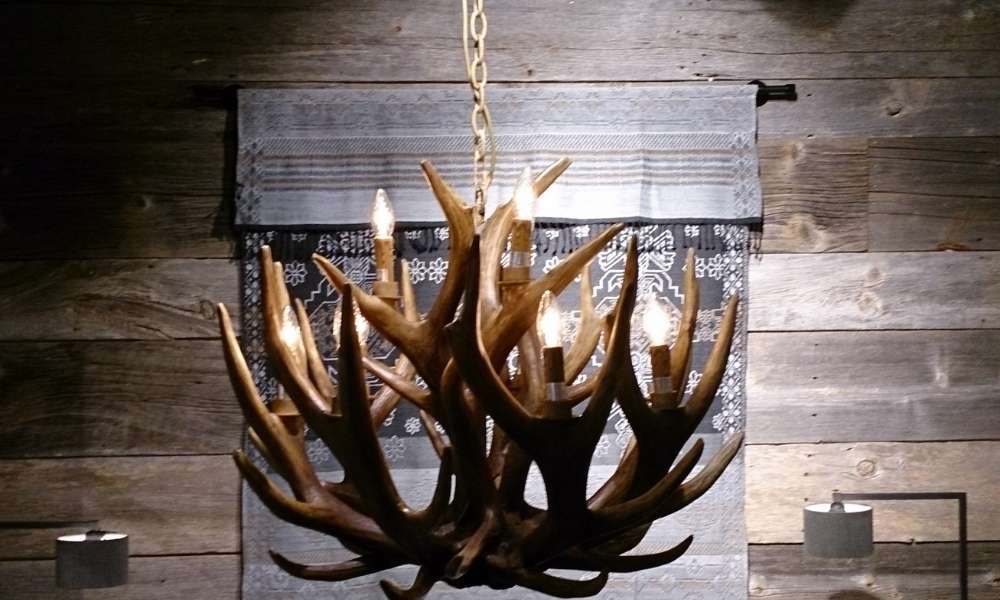
I am going to show you how to make an antler chandelier. Antlers are easy to come by, and they are also very beautiful.
Antlers are a renewable resource, so there is no harm in using them for decoration.
It is important to know that antlers come from the deer family, which is why I’m going to be using some deer antlers for this project.
I have all my materials ready, let’s get started!
How to Build Antler Chandeliers
I am going to show you how to make an antler chandelier. Antlers are easy to come by, and they are also very beautiful.
Antlers are a renewable resource, so there is no harm in using them for decoration.
It is important to know that antlers come from the deer family, which is why I’m going to be using some deer antlers for this project.
I have all my materials ready, let’s get started!
First, I am going to cut the antlers down into smaller pieces with my saw. Once I’ve cut the antler down into smaller pieces, I’m going to carve out holes so that it will fit onto the hook that we’ll use as a suspension system. Once I’ve done that, then I can glue them onto the hook. We’ll need 1 hook and 8-12 pieces of antler depending on size.
Next, we’re going to create a thread loop and sew it onto our hook system. Then attach the thread loop to your suspension system and hang your chandelier!
The main parts of the chandelier

The first thing you will want to do is find your antlers.
Next, you will want to draw out the size of your antlers on a piece of paper.
Cut out the shape and start drilling holes in it with a drill bit that is just a tad smaller than the wire you are going to use.
Once all your holes are drilled, then you can start stringing your wire through the top hole and down through each hole until it reaches the bottom.
Get some scrap wood and lay it across the top of the wire sticking up from the bottom.
Use a staple gun to attach them together so they do not pull apart when you put weight on them. Attach these two pieces together by using some screws to secure them in place.
You will need an additional piece of wood for this project, but we’ll get there in a moment.
Measure the height of where you’ll be hanging your chandelier and cut a piece of wood accordingly (or have this done for you at the home center).
Screw this board into both sides of your newly assembled base using screws that are long enough to go into both boards evenly. Now take your wire that is coming out of the top hole, wrap one end around one screw, wrap another side around another screw, and finally wrap any remaining wire around any other available screw in order to secure it in place. This can be done at any angle as long as it’s secured properly
Carving the antlers

I first created a template for the antlers to be cut. You could just use the natural shape of the antler, but I wanted to make mine more symmetrical.
To start, I cut out a circle near the top of one of my antlers, this is where it was going to attach to the chandelier base.
I then took my other antler and made a paper pattern. I transferred this pattern onto one of my antlers and cut out all four sides on these two antlers.
Now we need to drill holes in each side of each deer antler so that we can later string them together.
If you don’t have access to a drill, you can also do this by hand with a screwdriver or large nail. I have drilled out all eight holes on both sides of both deer antlers.
We need some wire so that we can tie our two deer antlers together at the top.
I am using old lamp wire that I had around from another project that I’ve been meaning to finish for months now…if only there was an app for organizing projects??
Cutting and wiring the antlers

I got the antlers of my deer and I am going to cut the antlers into two pieces.
I can cut them in any shape I want, but for this project, I am cutting them as a design that I have in mind.
The next step is to wire one-half of the antlers to the other half.
Connecting the electrical wires

Connecting the electrical wires is a little trickier than you may think. You will have to strip the end of the wire and twist it tightly around the two wires on either side of it, then tighten them with pliers. I recommend doing one at a time so that the wire doesn’t get twisted up together. When you are done with this step, cut off any excess wire that might be left on the outside of the twisted wires.
Fix the bulb holders
I am going to attach the bulb holders to the antlers. I’m going to make sure that they are the same distance apart. The best way to do this is by laying them out and then marking them with a pencil where you need to drill. It is important to note that you should use a power drill for this step!
What are the advantages and disadvantages of an antler chandelier?
There are many advantages to using an antler chandelier. First, they’re very easy to make and can be done with a few simple tools. Another advantage of an antler chandelier is that they are not expensive, meaning that you won’t need to break the bank to get one.
Finally, there is no harm in using the deer’s antlers for decoration purposes, because they come from a renewable resource.
There are also disadvantages of an antler chandelier. If you don’t have any experience building furniture or using power tools, this project may not be for you as it does require some degree of skill and knowledge. Also, once you’ve made your chandelier and hung it up, it will require frequent dusting to keep the dust from settling on the delicate antlers.
Conclusion
The deer antler chandelier is a beautiful and rustic design that’s perfect for an outdoorsy, hunting-lodge type of feel. If you’re looking for a budget-friendly option, this is it! They are also relatively easy to make, but you’ll need some tools and materials. more:
Here’s a list of what you’ll need:
- A pair of antlers
- Wire cutters
- A drill
- wire nuts
- A socket with an extension cord
- 2 light sockets
- 2 light bulbs
- Wood screws
- Chandelier chain


